As Fashionistas/os, we always want to keep our wardrobes up-to-date with the latest trends. However, as college Fashionistas/os, we may not always have the funds to afford new clothes—especially for styles that may only be in-season for a couple months.
Thank goodness for fashion DIY. With a few scissors snips and creativity, you can transform your own, tired pieces into super trendy, of the moment looks.

Cutout Choker Shirts:
Step 1. You’re only going to need two things: a cute, crew neck T-shirt and a pair of sharp scissors. The scissors don’t have to be fabric scissors, but those will probably work best!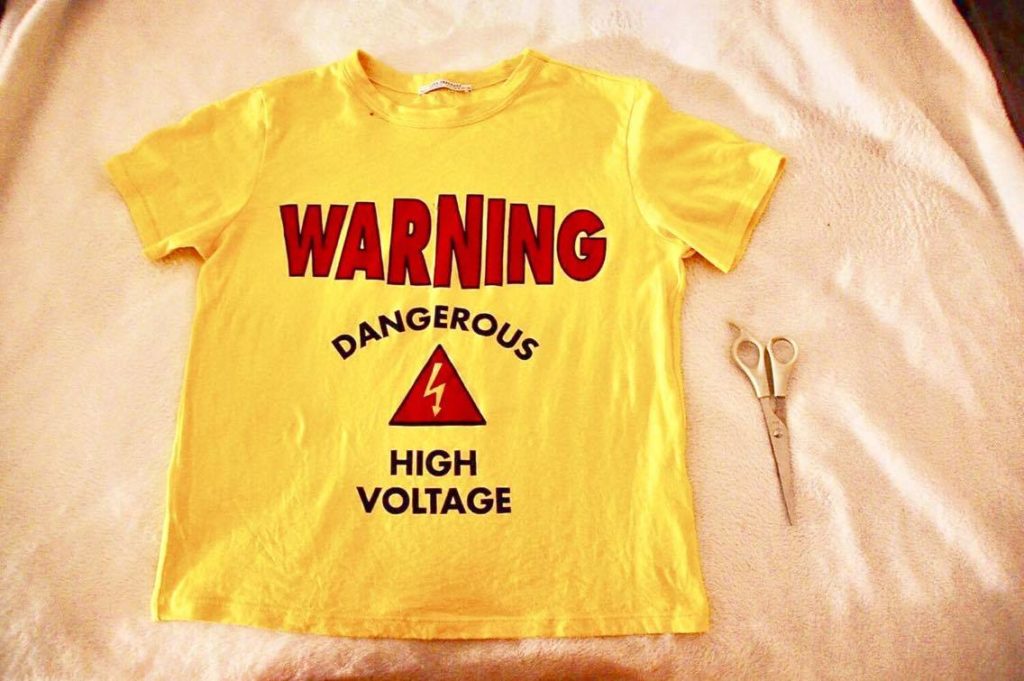
Step 2. Layout your favorite tee on a flat surface, making sure to smooth out any wrinkles.
Step 3. Pick up the shirt and attempt to lay it out by pinching the front and back of the shirt. Align the seams on the sides, along with the shoulder seams. It’s imperative you find the middle of the shirt, so your cutout isn’t crooked!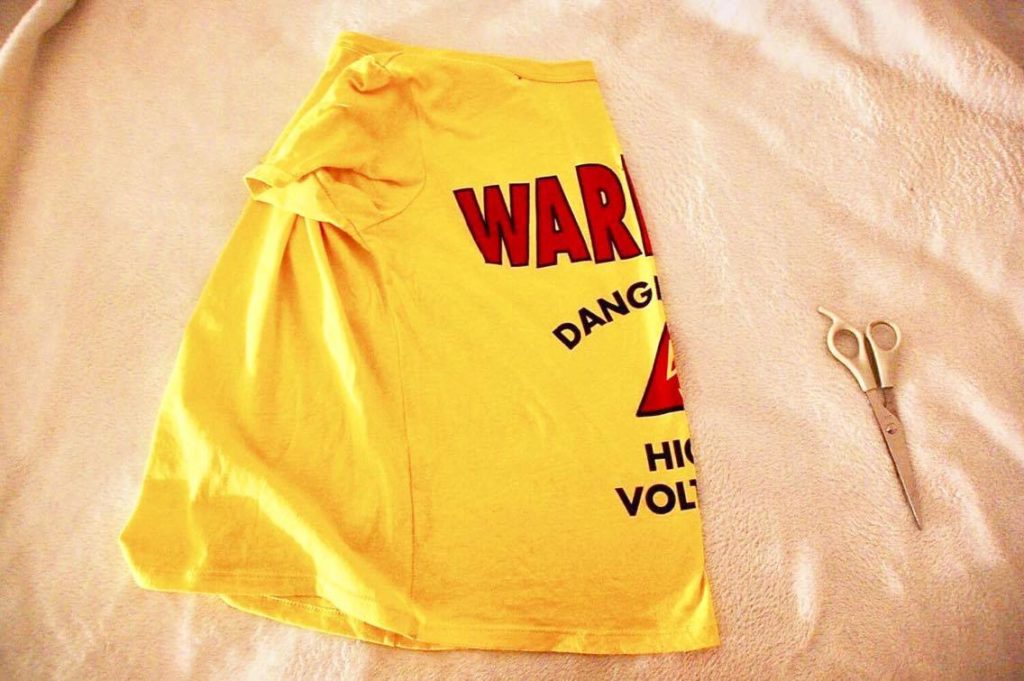
Step 4. Pick the depth you want for the cutout. If you are unsure of the depth you want, try the shirt on inside-out and make a very light mark near the center of the shirt of how deep you’d want the cutout to be.
Step 5. Cut from the center of the shirt towards the collar in a diagonal line. Make sure the shirt is folded correctly, so that way you are not cutting the back!
Step 6. Once the cut has been made, lay the shirt flat (like in step two), and cut along the collar. Remove the triangular flap to reveal a cool cutout-choker look!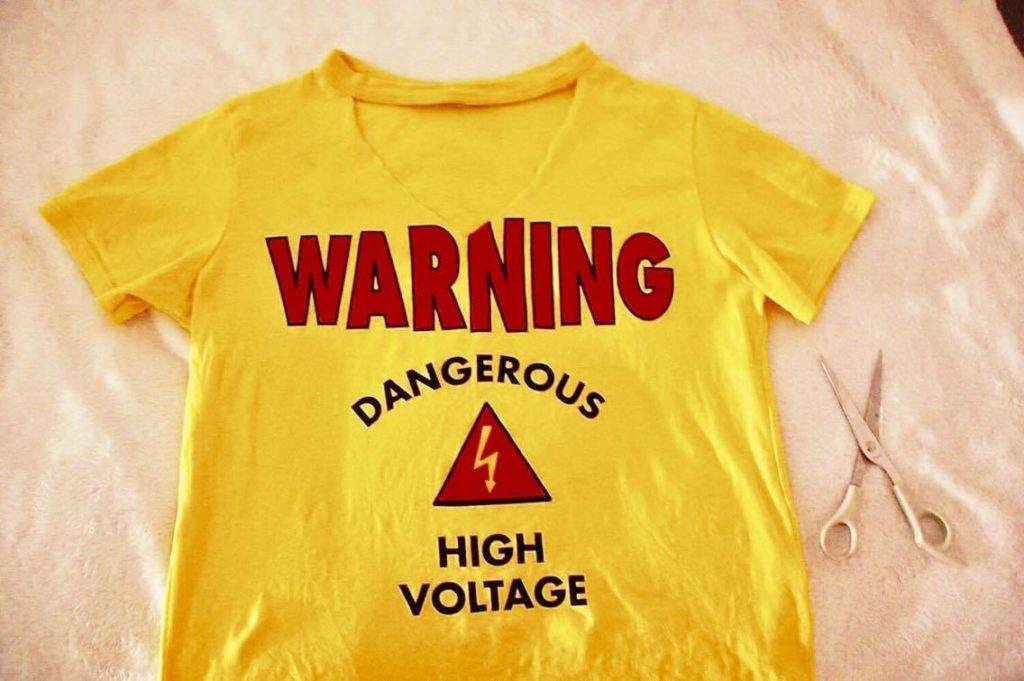
Super Distressed Jeans:
Step 1. You’ll need four things to create this look: a pair of jeans, a shaving razor, tweezers, and a pair of scissors.
Step 2. Take the jeans and pinch them in places where you want the holes. You can either wing your hole placement (I mean, why should ripped jeans be perfect anyways?), or you can try them on and mark the spots you want the holes to be. Pinch the jeans and create two horizontal cuts with the scissors. These cuts should be about the same in length and parallel to each other!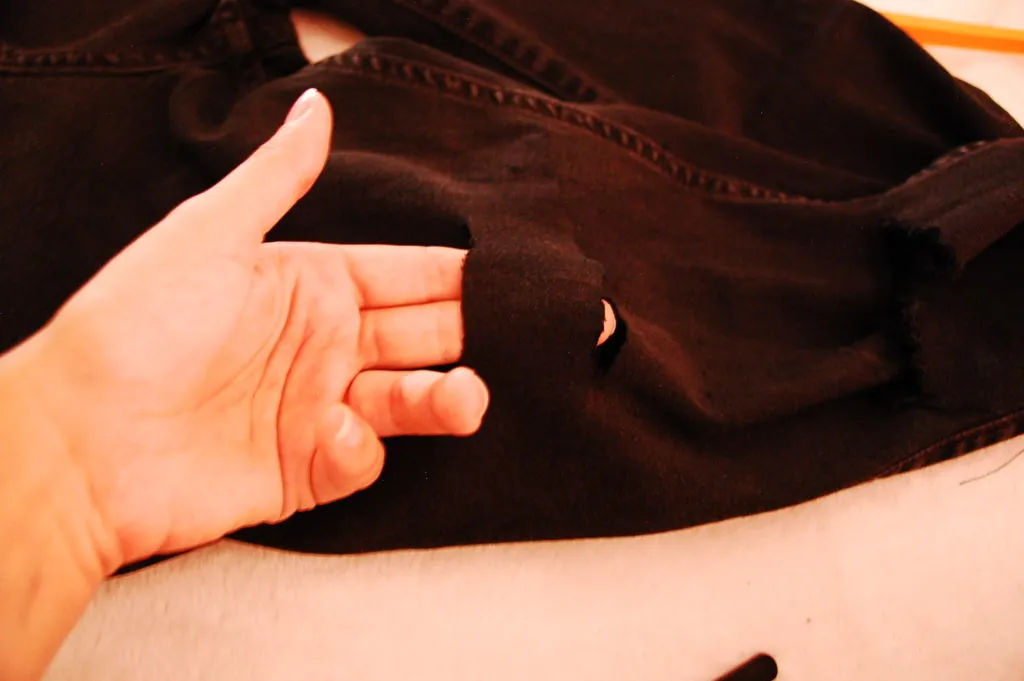
Step 3. Take your tweezers, and using your carefully-practiced-brow-plucking skills, carefully remove each of the vertical strands in the fabric between the two cuts.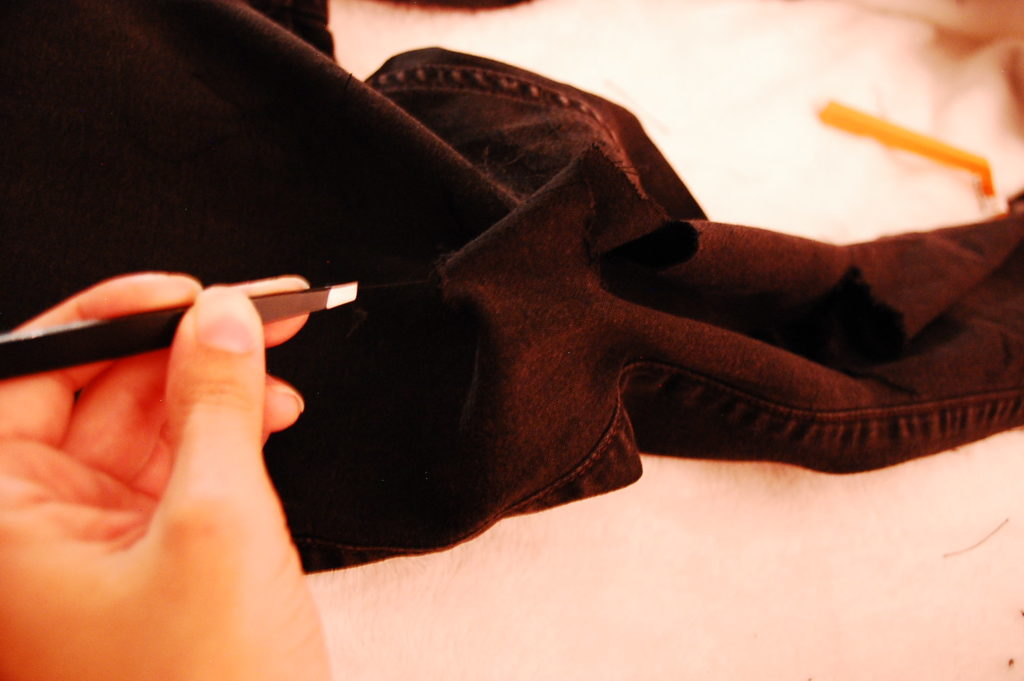
After doing this repeatedly, the fabric should start to unravel. You can then use the razor to lightly distress spots onto your jeans, like on the pockets!
These two DIY styles are super simple and very on-trend! You can finally start telling people “no, I didn’t buy my jeans with holes in them!”

After following the steps in this article, show off your look on social media! Don’t forget to tag @cfashionista!
