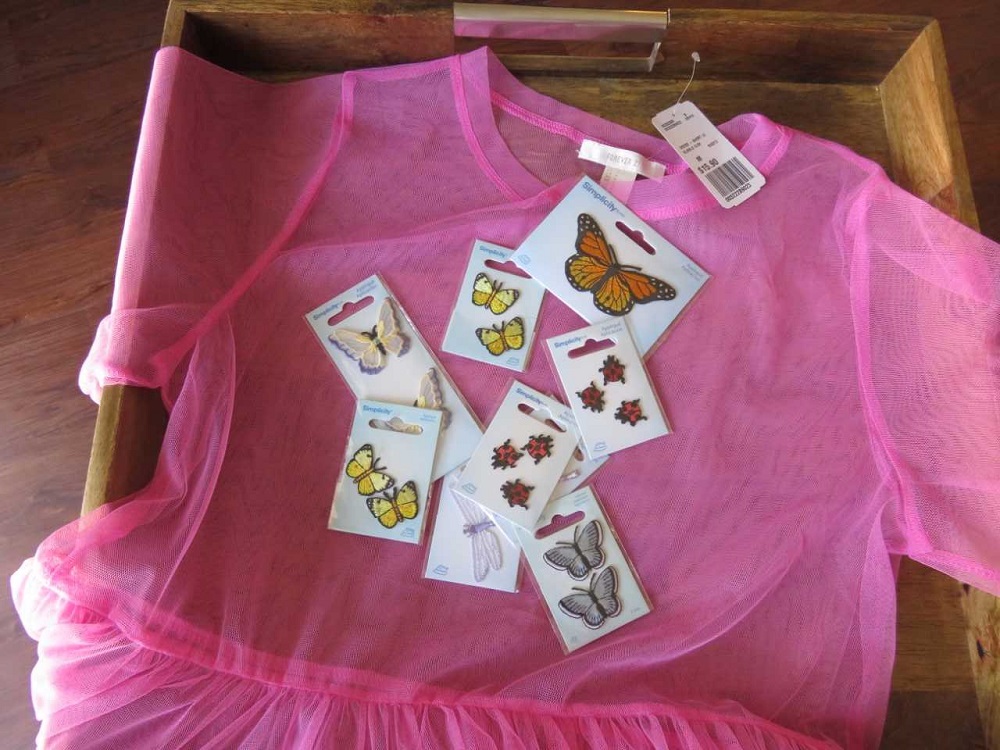
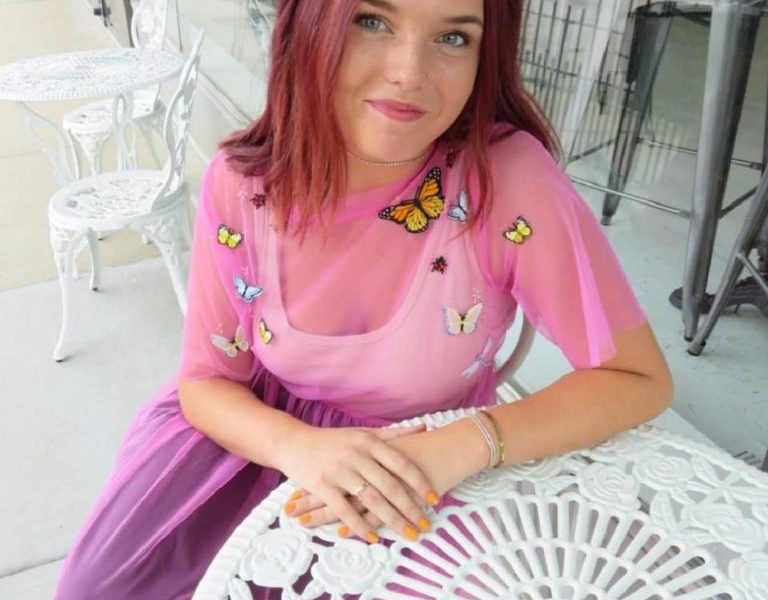
This years summertime DIY project began when I fell in love with a midi mesh dress from Forever 21. As soon as I laid eyes on this dress, I knew it was the perfect canvas to transform it into something special. After searching through my beloved fashion Pinterest board for inspiration, I stumbled across a photo I saved months ago of a Valentino trench coat. It was decked out in sparkly embroidered bumblebees, beetles, and butterflies. I was once again in love. Not fully convinced of its trendiness? Lots of other designers including Gucci and Dior have also played around with buggy fashion. And with that, my project was born. I bought my patches from Jo-Ann’s but if you’re looking for uniqueness I recommend Etsy. Here are the steps to create this nature-inspired dress.

1—Before you begin to sew, remove your patches from their wrappings. If the patches have an almost sticky backing to them, do not try to remove it! It’s there to keep the patch together. Next, play around and arrange your patches exactly where you want them to go. It’s your personal piece, design it exactly how you like it. Be creative! Take a picture when you’re done so you can always go back and look at your original layout.
2—Make sure you have a sharp sewing needle, pins, thread, and scissors. You’ll want to pick a thread color that matches the edges on your patches unless you’re your inner creative goddess desires a contrasting color for design reasons. Thread your needle (you can double up the thread to strengthen it, which is smart when working with mesh fabric) and tie a knot at the end of your string. You don’t want the length of your string to be too long because it can become a hot mess very quickly.
3—Secure your patch with pins so it doesn’t move when you’re sewing.
4—Start your stitch on the inside of your garment to hide the knot at the end of the thread. Push the needle through the fabric and the patch. Weave in and out around the edge, making sure to keep the stitches close together.
5—Once you’ve made it all the way around your patch and it is completely sewed on, a knot needs to be made so your stitching doesn’t unravel or become loose. On the backside of the garment, insert the sewing needle under the first stitch you made and pull until a loop forms. Stick your needle into the loop and pull gently. This will create a knot. Repeat this about four times.
6—If you’re feeling glitzy, try sewing on beads for the perfect finishing touch like I did!
Finish this outfit with a crop top and bodycon skirt, a tank with pants, or a simple nude slip underneath!

What DIY projects have you mastered this summer? Let us know in the comments below!

